
Resources
Dry-Fire Practice
Quick GlanceHow to practice at home with an unloaded gun: a strict safety routine first, then five simple drills that build a better trigger press, sight picture, draw and reload.
Dry fire means practicing with an unloaded gun and no ammunition at all. A few minutes a few times a week can do more for your shooting than an occasional trip to the range, and it costs nothing. It is only safe if you follow the same safety routine every single time.
Why Dry-Fire?
Most missed shots come from what happens just before and during the trigger press: a flinch, a jerk, or sights that drift off the target. Without the noise and recoil of live ammunition, you can see those mistakes and fix them. Dry fire is also the safest way to practice your draw from a holster and your reloads.
Many good classes teach dry-fire too. See our dry-fire course page.
Safety Routine First
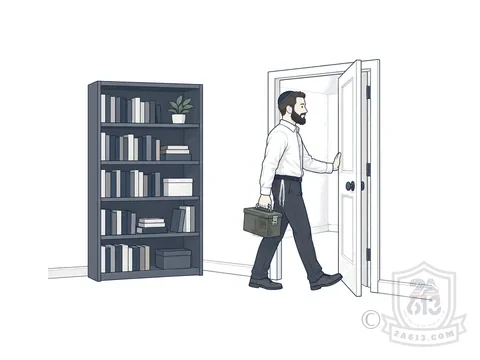
Do every step, in this order, every time:
Pick a dedicated spot in your home that you use only for dry fire, with a safe backstop: a direction where a bullet would be stopped and nobody could be on the other side, like a basement wall or a thick bookshelf full of books.
Unload the gun. Remove the magazine, lock the slide or open the action, and look into the chamber.
Take every round out of the room. Loaded magazines, loose rounds, the box of ammunition and your carry ammunition all go into another room.
Check again. Look into the chamber and magazine well, then feel them with your finger. Check every magazine you will use: they must be empty.
Put up a small target, like a sticker or a dot, on your backstop.
Remove distractions. Phone on silent, and let your family know you are practicing.
Say it out loud: "I am starting dry fire." It sounds silly, and it works.
Some guns, especially rimfire (.22) guns and some older designs, can be damaged by dry firing. Check your owner's manual, and use a snap cap if it says so.
Five Drills
Start with Drill 1. Add the others as each one feels easy. With most striker-fired pistols you will need to pull the slide back slightly (or rack it) to reset the trigger between presses.
1Front Sight on the Dot
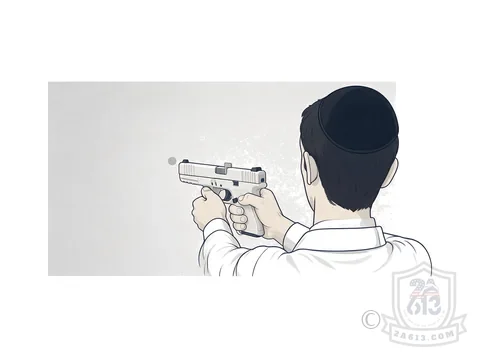
- Stand in your shooting stance, about 3 to 5 steps from the dot.
- Line up your sights on the dot and focus on the front sight.
- Press the trigger slowly and smoothly straight back until it breaks.
- Watch the front sight. Did it dip or move off the dot when the trigger broke?
Goal: the front sight stays still on the dot as the trigger breaks, 10 presses in a row.
2The Coin (Balance) Drill
- Hold the gun steady with the sights on the dot.
- Have a helper balance a coin (or an empty brass case) flat on top of the slide, just behind the front sight.
- Press the trigger slowly, without letting the coin fall.
Goal: the coin stays on through a smooth press. If it falls, slow down. This works best with guns whose trigger stays reset, like many hammer-fired guns and revolvers.
3Find Your Sights Fast
- Start at a ready position, with the gun pointed down at the floor in front of you, finger off the trigger.
- Push the gun out to the dot in one smooth motion.
- Your sights should land on the dot without hunting for them. Press the trigger only if the sights are on target.
Goal: the sights arrive on target every time you bring the gun up. Close your eyes before the press, then open them: are you still on the dot?
4Draw from the Holster
- Wear your normal holster and clothing.
- Slowly: clear your clothing, grip, draw, point the gun toward the target, bring your support hand in, push out to the dot.
- Press the trigger once with the sights on the dot.
- Then holster slowly, finger off the trigger, looking the gun into the holster.
Goal: a smooth, safe draw, slowly first. Speed comes on its own. See our Holsters and Carry guide.
5Magazine Changes
- Use empty magazines only.
- Start with an empty magazine in the gun and another on your belt or in a pocket.
- Press the magazine release, reach for the fresh magazine, seat it firmly, and release the slide.
- Keep your eyes on the target and the gun pointed at the backstop the whole time.
Goal: a smooth reload without looking down. Dummy rounds (inert practice rounds) can be added later, but never live ones.
Finishing Safely
The most common dry-fire accident happens after practice: the gun gets reloaded, and then the shooter does "just one more" press. To avoid it:
Say it out loud: "Dry fire is over."
Put the gun away or reload it in a different room, away from your practice spot.
Once it is loaded, don't practice again that day. If you want more practice, start the whole safety routine again from step 1.
Tips
Slow is smooth. A perfect slow press teaches more than ten fast, sloppy ones.
Short and often beats long and rare. 10 minutes, 3 times a week, is a great start.
Follow up with live fire at the range, to check what you learned. See our Range Etiquette guide.
Never practice with a carry gun that you just unloaded without following the full routine. Distraction is the enemy.
Also in our glossary: Dry Fire, Snap Cap, Dummy Round and Trigger Discipline.
New to the terms? See the 2A Glossary.
To be accepted into our chats: after tapping Join, send us a message through the Contact Us page, choose “Join WhatsApp Groups Request”, then reply to the automatic email with all the requested details.
Your Application, Handled From Start to Finish.
One-on-one help with new applications and renewals. The decision to carry is yours; the paperwork, the checklists and the scheduling are ours.
- We Prepare the PaperworkEvery form filled out and submitted for you, with your authorization. Notary services available.*
- We Check Every DocumentEvery requirement checked before anything goes in.
- You Show Up ReadyYour 18-hour training scheduled, and you're prepped for fingerprinting and the interview.
Three Steps. Zero Guesswork.
- 1Tell Us What You NeedFill out the short request form.
- 2We Review & AdviseWe review your situation and advise on the best approach.
- 3You Apply With ConfidenceYour packet goes in complete, and we stay with you to the finish line.
Every completed application we've handled so far has been approved — but approval is always the agency's decision.
Or message us on WhatsAppA paid service. Every free guide stays free. The initial consultation is free. No paid work starts until you agree to the quote and a paid deposit, which is determined during the initial consultation. *Additional fees and restrictions apply. Past results do not guarantee future approval.
Join the 2A613 Community
Take our community survey and subscribe to updates. We only email about important topics and never sell your email to third parties.
Take the surveyLast updated: 11/07/2026 · כ״ז חשון תשפ״ז